Friday was a wonderful day at KJW! I pulled in the driveway with my Wawa lunch and my UPS driver was sitting there with a pair of Festool boxes. :- D
Quickly I opened up the shop and hauled them in. My sandwich forgotten as I opened my delivery...fresh off the boat from Germany.
The FestoolUSA community has been all abuzz for months waiting for the new Domino XL to arrive on this side of the pond.
The first small batch has made it into Yankee hands!
Over the next three months I'll be putting this beast through it's paces.
And let me tell you. I can't wait!
So let's see what we have here...
The Domino XL comes in a SYS 4
(OOPS - Make that a SYS 5). But even so it's SO big that Festool had to make a cradle to hold it at a diagonal. This does make getting it in and out of the SYS pretty easy.
Also packed into the SYS are slots for the the various accessories. Mine came with a cross stop, a trim stop and a support bracket. And there's also space for a pair of domino trays. (NOTE: The cross stop and trim stop are extras...)
There's a complete set of cutters stored in the lid. The Domino XL, being XL, has large cutters. The smallest being 8mm x 50mm. That's 5/16" x 1 15/16" for you non-metric types.
The largest being 14mm x 70mm! (9/16" x 2 3/4")
In comparison the Domino 500's cutters range from 4-10mm in diameter and are much shorter.
That 14mm cutter is bigger than my index finger.
Talk about wood removal!
Nice facets too...
(NOTE: The base Domino XL package only includes the 10mm cutter...)
(OOPS again! The base Domino XL comes with the 12mm cutter!)

Outta the SYS...
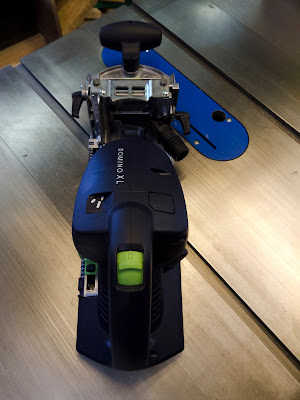
From the top...
On the left side of the Domino you have a large lever (just under "Made in Germany") to control width of the mortise.
Also there's a very nice set of adjustments for the depth of the mortise. A top slider let's you set the depth from 15-70mm. You also have a pair of stops to set minimum and maximum if you're doing production work where you want different depths.
The dust collection port on the right side.
I'm thinking that running this thing without a dust extractor attached to it would be just plain silly.
(FestoolUSA notes that you can NOT use the Domino without a dust extractor attached)
Back on the right side is a pair of scales for setting the height of the fence.
At the bottom is a stair step that let's you work in 5mm increments. Above that is a fine scale where you can measure to the 1mm.
The adjustment lever for height is on the right side of the fence so your big old hand doesn't block scale while you're trying to read it.
A close up of the 5mm stair step gauge.
Also on the right side is the adjustment lever and scale for the fence angle.
There are detents at 22.5, 45 and 67.5 degrees. Seems fairly easy to read for 1 degree adjustments. But to be honest I don't think I'll be using anything but 0, 45 and 90. Time will tell...
The new paddle/pin setup.
The pins are 20, 37 and 50mm from center allowing for repeatability in production.
Nice solid feel to them. I don't think there's going to be any side-to-side play in them.
The green button in this photo is the catch release for the pins. One to a side. The button releases the three pins and then you you push which ever pins you don't want at the time back into their hole.
You'll also notice a notch on the side of the fence. It appears to mark the centerline of the cutter. There's no documentation to confirm, so I'll check this in use next week. (FestoolUSA confirms the notch is cutter centerline)
Similar to the 500 you slide the fence assembly off the motor to install a cutter. Nice beefy guide rails.
No chance in the world you'll put it back together upside down!
Read your manual!
Most of it is typical Festool cut and dry. But this one warning box is pretty darn important. Those cutters can go all the way through 2 1/2"
+ of wood!!!
I like my hands just the way they are.
As I was saying...
This thing can make some holes in whatever gets in its way.
Loaded and ready to mortise.
Time to hook up the CT-26 and see what this thing can do.
I'll post more in a few days...


