Tuesday, February 7, 2012

Details of my setup block...

I thought I would elaborate on my setup blocks...


The first set of mortises on my setup blocks correspond to the fence heights that you can set with the stair step gauge.

Pictured is the setup block for the 12mm cutter.

The stair step gauge has settings for - 10, 15, 20, 25, 30 and 40mm. The fence raised to its maximum height registers at 52mm.


I would advise against using the 14mm cutter and the 10mm fence height position. It leaves less than 1/8" of sidewall to the mortise!


The other set of mortises correspond to the use of the three equidistant pair of pins.

The manual states that the pins are 20, 37 and 50mm from the cutter centerline to the inside edge of the "pinned" mortise.

Being able to quantify the center-to-center or outside edge-to-outside edge distances seems much more useful to me.

This is easily done with the setup block.


Trim stop compatibility

The latest version of the trim stop is designed to work with either the 500 or 700 XL.

The pin carrier can be flipped for proper alignment of the pin to the cutter...

First bores...

I took a quick trip down to my local Woodcraft yesterday morning so that the staff there could get there first look at the new Domino XL and I could do some side-by-side comparison with the 500. The staff at the New Castle Woodcraft (http://www.woodcraft.com/stores/store.aspx?id=551) is always super helpful so it was fun to share the new Domino with them!

Mike and crew were impressed with the new tweaks to the Domino. They were particularly impressed with the new paddle/pin design which is a major improvement over the 500.

So I came back home and finally plugged the beast in and started boring...


The first thing I wanted to do was make some sample blocks with the different cutters in their various settings.

I milled some cypress up for my sample blocks.


Thank you Peter Parfitt over in merry olde England for this idea! Here's a link to his reviews - http://www.youtube.com/watch?v=RsyGqi-lR5c

The first thing I noticed was just how effective the dust collection is. I had the XL attached to my CT 26 with the suction set to full. Not a speck of dust left in the sample block mortises. I WAS able to overwhelm the dust extractor when I bored full depth (70mm) mortises with the 14mm cutter.


But as you can see. There really wasn't much dust left in even this mortise.


There's two settings for mortise widths on the new XL.

One designed to fit tightly...


...and one designed to allow for a bit of side-to-side play.


It's quite easy to bore through tenon holes. My sample blocks are 1 7/8" thick and all the cutters were able to fully pierce the block.

(NOTE: I did this with a backer block clamped on and my hand well out of the way!)


I think this ability will be very handy when building something like a set of traditional raised panels to line someone's library or study. Basically anywhere you have raised panels side by side and you have multiple rails sharing a stile.


More soon...

Sunday, February 5, 2012

What's in those Festool boxes!?!


Friday was a wonderful day at KJW! I pulled in the driveway with my Wawa lunch and my UPS driver was sitting there with a pair of Festool boxes. :- D

Quickly I opened up the shop and hauled them in. My sandwich forgotten as I opened my delivery...fresh off the boat from Germany.


The FestoolUSA community has been all abuzz for months waiting for the new Domino XL to arrive on this side of the pond.

The first small batch has made it into Yankee hands!

Over the next three months I'll be putting this beast through it's paces.

And let me tell you. I can't wait!


So let's see what we have here...

The Domino XL comes in a SYS 4 (OOPS - Make that a SYS 5). But even so it's SO big that Festool had to make a cradle to hold it at a diagonal. This does make getting it in and out of the SYS pretty easy.


Also packed into the SYS are slots for the the various accessories. Mine came with a cross stop, a trim stop and a support bracket. And there's also space for a pair of domino trays. (NOTE: The cross stop and trim stop are extras...)


There's a complete set of cutters stored in the lid. The Domino XL, being XL, has large cutters. The smallest being 8mm x 50mm. That's 5/16" x 1 15/16" for you non-metric types.

The largest being 14mm x 70mm! (9/16" x 2 3/4")

In comparison the Domino 500's cutters range from 4-10mm in diameter and are much shorter.


That 14mm cutter is bigger than my index finger.

Talk about wood removal!

Nice facets too...

(NOTE: The base Domino XL package only includes the 10mm cutter...) (OOPS again! The base Domino XL comes with the 12mm cutter!)
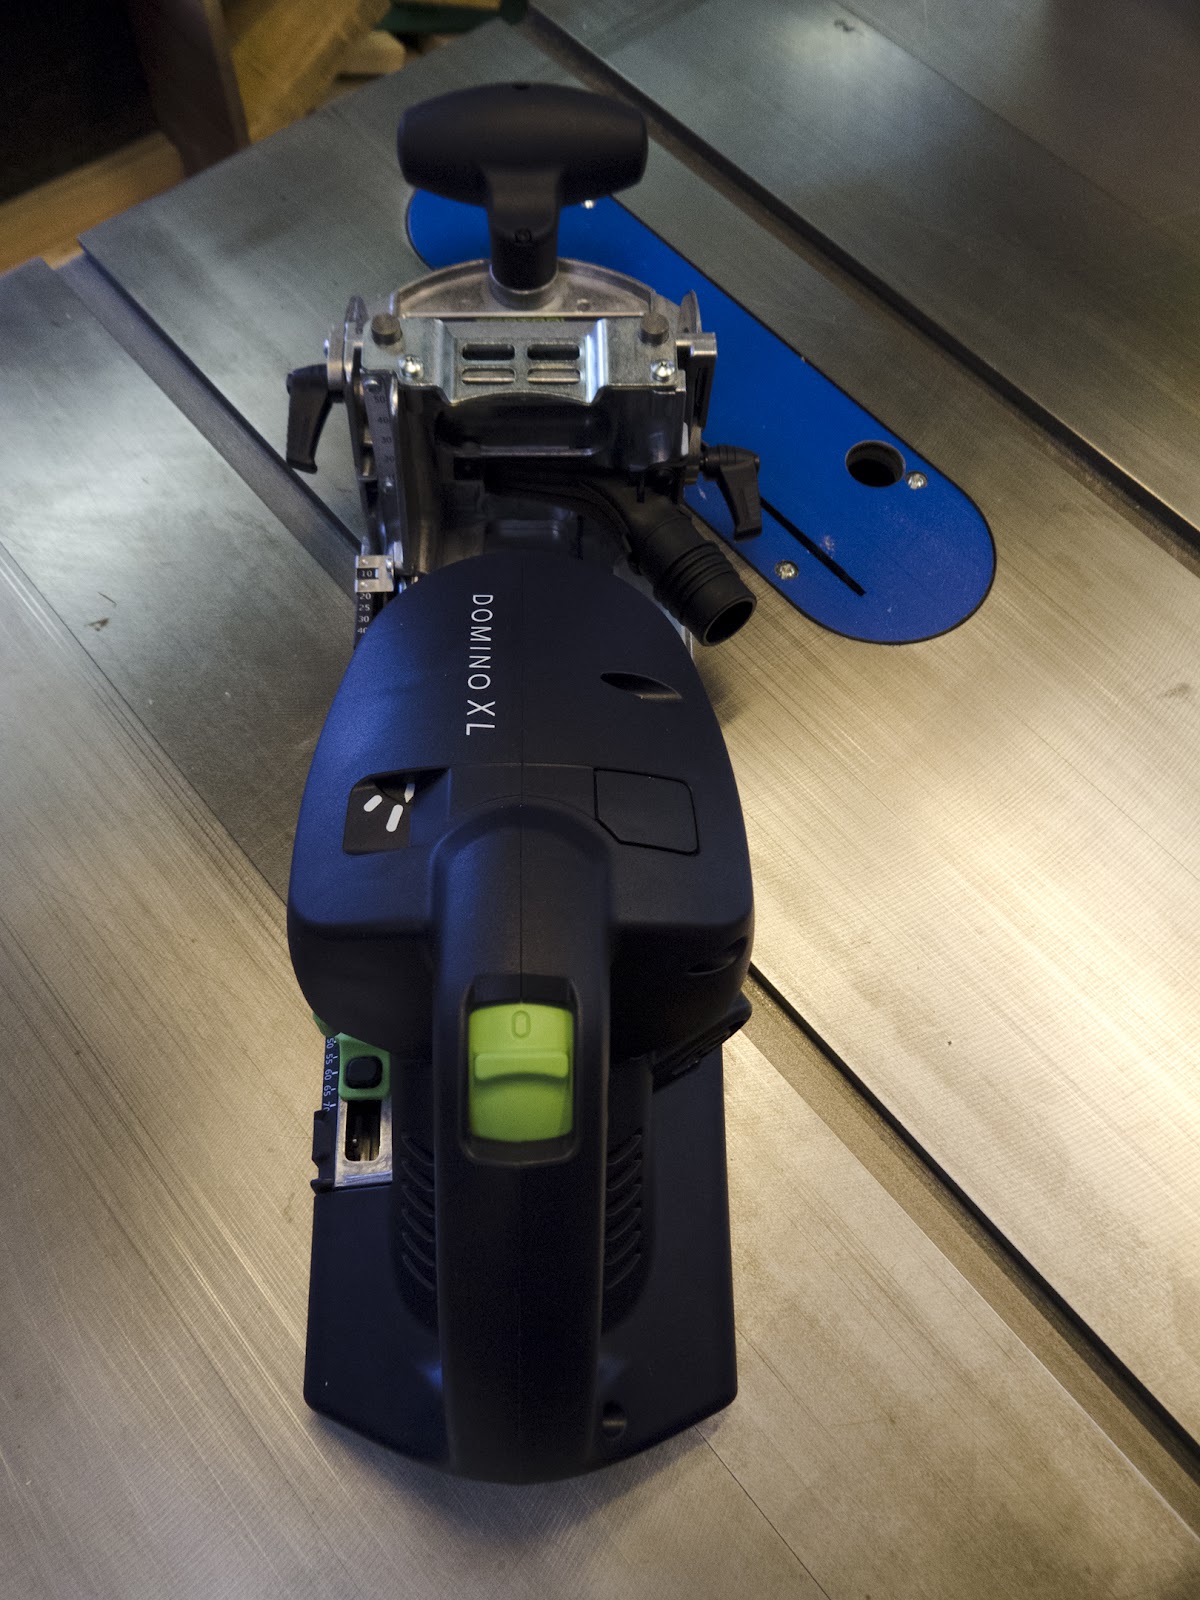


Outta the SYS...


From the top...


On the left side of the Domino you have a large lever (just under "Made in Germany") to control width of the mortise.

Also there's a very nice set of adjustments for the depth of the mortise. A top slider let's you set the depth from 15-70mm. You also have a pair of stops to set minimum and maximum if you're doing production work where you want different depths.


The dust collection port on the right side.

I'm thinking that running this thing without a dust extractor attached to it would be just plain silly.

(FestoolUSA notes that you can NOT use the Domino without a dust extractor attached)


Back on the right side is a pair of scales for setting the height of the fence.

At the bottom is a stair step that let's you work in 5mm increments. Above that is a fine scale where you can measure to the 1mm.

The adjustment lever for height is on the right side of the fence so your big old hand doesn't block scale while you're trying to read it.


A close up of the 5mm stair step gauge.


Also on the right side is the adjustment lever and scale for the fence angle.

There are detents at 22.5, 45 and 67.5 degrees. Seems fairly easy to read for 1 degree adjustments. But to be honest I don't think I'll be using anything but 0, 45 and 90. Time will tell...


The new paddle/pin setup.

The pins are 20, 37 and 50mm from center allowing for repeatability in production.

Nice solid feel to them. I don't think there's going to be any side-to-side play in them.


The green button in this photo is the catch release for the pins. One to a side. The button releases the three pins and then you you push which ever pins you don't want at the time back into their hole.

You'll also notice a notch on the side of the fence. It appears to mark the centerline of the cutter. There's no documentation to confirm, so I'll check this in use next week. (FestoolUSA confirms the notch is cutter centerline)


Similar to the 500 you slide the fence assembly off the motor to install a cutter. Nice beefy guide rails.

No chance in the world you'll put it back together upside down!


Read your manual!

Most of it is typical Festool cut and dry. But this one warning box is pretty darn important. Those cutters can go all the way through 2 1/2"+ of wood!!!

I like my hands just the way they are.


As I was saying...

This thing can make some holes in whatever gets in its way.


Loaded and ready to mortise.

Time to hook up the CT-26 and see what this thing can do.

I'll post more in a few days...


Friday, February 3, 2012

ANOTHER walnut table...

Super stoked!

Just 24 hours after the Boys & Girls Club auction I have a deposit in for another hall table...


The top's been selected. Now time to start work!

Boys & Girls Club donation...

The cat's outta the bag!

A huge crowd showed up for the Boys & Girls Club Fundraiser at Timothy's restaurant last night. I was very pleased that my piece was put front and center of the auction items. I think it was well received, it went home with some lucky bidder!


It was enjoyable coming up with something out of the norm for the type of pieces that go through my shop.

The inspiration was these great pieces of black walnut that I have laying around. I just did a quick sand of the top with my Festool RO-150 leaving as much of the natural wain edge as possible. Worm holes and all!

Then I just went straight to a water based urethane finish. I think the piece would have looked even more stunning with an oil finish, but I didn't have time for oil to cure out properly before the auction.

It still looked stunning!


For the base I wanted a secondary wood that was nice and light colored to contrast with the richness of the black walnut. I considered using maple, but I had some cypress and thought the stronger grain would work well with the walnut.

I also wanted to do something with the sides to draw people to reach out and touch it. A hard thing considering how touchable the top is!


I milled a bunch of pieces of the cypress to different thicknesses and lengths. Then I re-glued them together. Staggering the bottom ends. Framed by a pair of slightly tapered legs.

A few cross members to tie the sides together and give a base for the top to be screwed to and were done.


I think next one will have a full shelf at the bottom for a nice plant, or something. And I'm thinking a nice small drawer under the top for all those little things that you want by the front door, but out of sight...


Time to go sand some more walnut...